


Written by Ambre Montespan - Updated on Jun 11, 2026
Table of contents:
That’s it! You now own a kalimba, but you’re not quite sure how to play it properly? You don’t know the essential steps to take before you get started? You want to improve your skills with this exotic, African-rooted musical instrument?
Having played melodies on the thumb piano for over 10 years now, I’ve had plenty of time to practise with this instrument. So I can easily show you how to take your first steps with the kalimba and share a few tips to help you improve.
To play the kalimba well, you first need to place the stickers and make sure the instrument is in tune. Next, learn the basic techniques by playing simple tunes. Finally, learn to read sheet music and create sound effects to keep progressing.
By reading this entire article, you will learn exactly what to do:
- Before playing the kalimba
- Play melodies like a pro with basic techniques
- To progress effectively with the musical instrument
All you need to do then is practise regularly to quickly achieve real, enjoyable results with the kalimba. You’ll be able to play many songs with ease, which will impress the people around you—and yourself, too.
Let’s get started right away on how to play the thumb piano perfectly.
What must you do before playing the sanza?
Before diving headfirst into learning the kalimba, it’s essential to place the stickers and check that the instrument is properly tuned.

How do you put the stickers on the thumb piano?
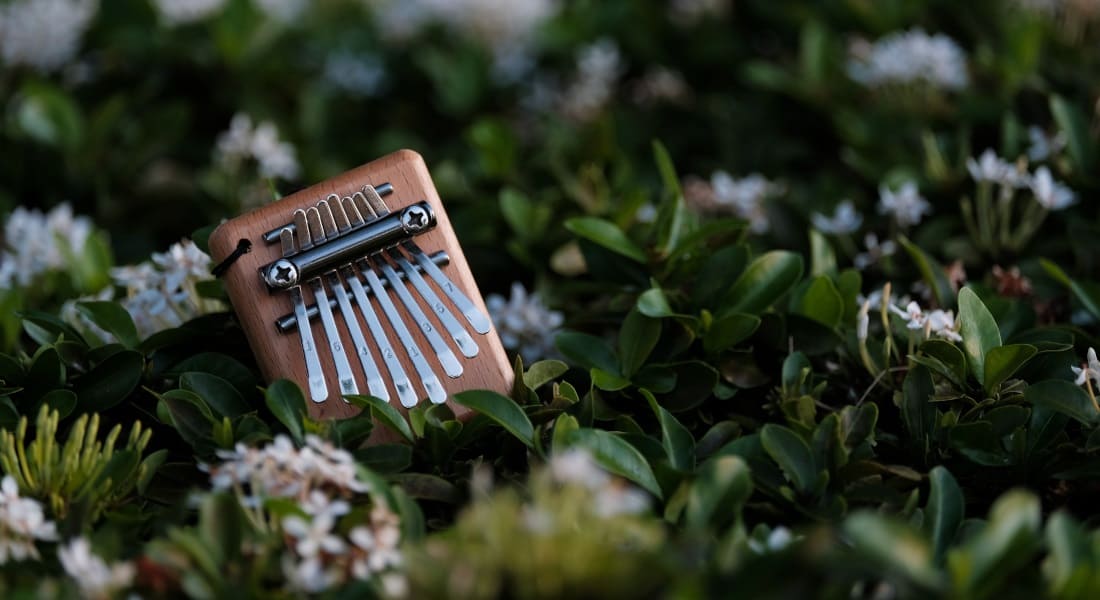
Almost all kalimbas come with a sheet of stickers. They can be coloured or printed with letters or numbers. All of these stickers will help you find your way around the instrument’s many steel tines. In fact, most new players regularly make mistakes when trying to play a note and end up plucking the wrong tine.
The primary purpose of the stickers is to help beginners avoid those mistakes by adding clear visual markers to the tines. This is an essential step unless you already know exactly where each note is. If not, we strongly recommend using stickers. Note that some kalimbas come with engraved tines, so stickers are optional in those cases.
Applying these stickers is very easy. To help you, I’ve created a handy guide on how to place the stickers on the kalimba. With this guide, whether you have a 17-, 21-, or 8-note kalimba, you’ll know exactly where to place the stickers and what each one is for. Alternatively, you can refer to the instruction booklet if it was included with your instrument.
Tuning your kalimba before playing
Tuning your thumb piano lets you confirm that every note produced by the tines is correct. It would be counterproductive to learn a song when half of the notes are out of tune. That’s why it’s highly recommended to tune your kalimba if you’ve never done it before or if it’s been a while since the last time.
Kalimbas are normally already tuned when they’re sold, so you might think you don’t really need to tune the instrument. In reality, it’s a little more complex than that. If one of the kalimba tines moves even a millimetre up or down, the note played by that tine will change.
The vast majority of kalimbas are sold online and delivered by carriers to the future user’s home. During transport, which can sometimes be quite rough, it’s very possible for the tines to shift—and not just by a single millimetre. As a result, even if the kalimba was tuned by the maker before shipping, which isn’t always the case, it may still go out of tune before it reaches you.
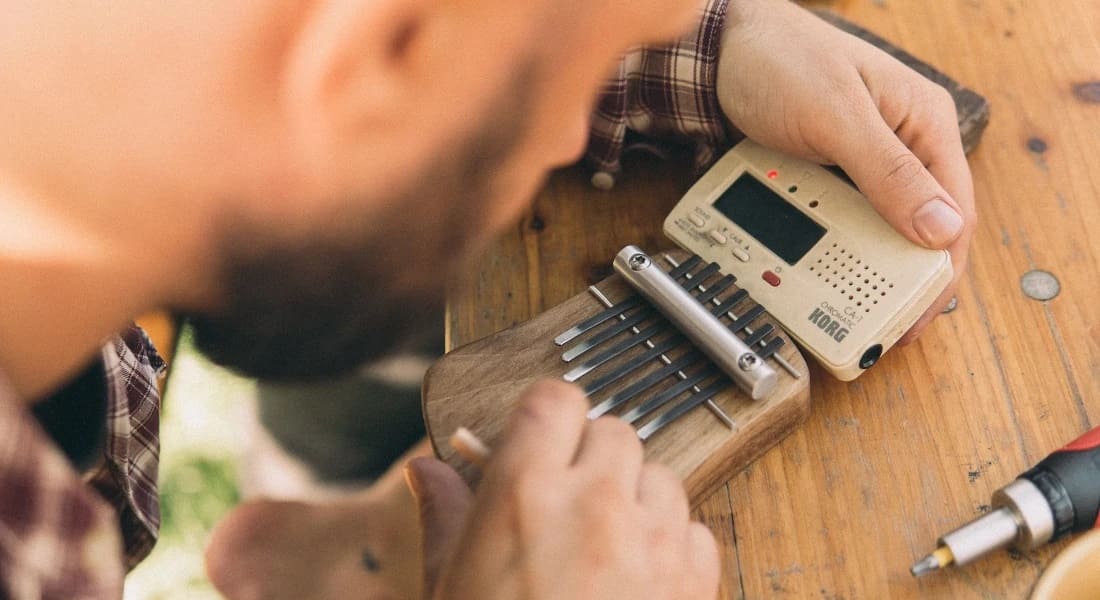
But don’t worry—tuning a kalimba only takes a few minutes once you’ve got the hang of it. What’s more, anyone can do it, and no special tools are required. You don’t need any specific knowledge, either. The icing on the cake is that a tutorial on how to tune your kalimba is available. This tutorial is completely free and will ensure that your thumb piano always plays true, pure, crystal-clear notes. All you need is a tuner.
Does playing the kalimba hurt your thumbs?
Unfortunately, yes—some players do experience thumb pain after playing for long periods. That’s why some musicians prefer to play only with their fingernails, which they let grow longer, or they use plastic thumb guards to protect their fingertips. Others push through at first, and their thumbs naturally toughen up over time.
Is it possible to play the kalimba without fingernails?
Again, yes, but as mentioned above, you’ll either need to push through any thumb discomfort or use an accessory to work around the issue. You can explore all the available solutions by reading this article.
Learn to play the thumb piano like a pro
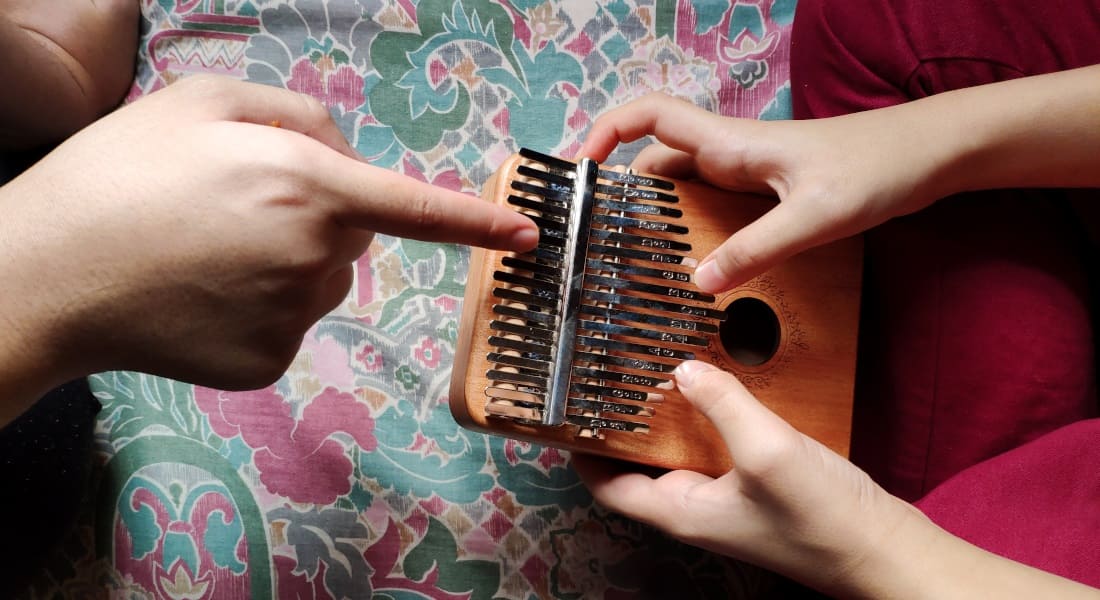
Now that you’ve done everything you can to play the kalimba well, it’s time to get straight to it. Hold the instrument between the palms of your hands, positioning it so that you can see the steel tines and they’re facing upwards. Your thumbs should rest on the front of the thumb piano, while your other fingers are on the back. Note that on some wooden kalimbas with a sound box, there may be two holes on the back. These are used to create a sound effect, and it’s best not to worry about them for now. Leave them open and don’t cover them with your fingers. The same applies to the central hole on the front.
Once you’re in the correct position, you’re ready to play musical notes. It’s very simple. If you have longer fingernails, press down on a steel tine with the edge of your thumbnail to flex it slightly downwards. Once you’ve applied enough pressure, release it suddenly without holding it back. The tine will vibrate and produce a sound. If you have short fingernails, you can still play with the pads of your thumbs, but it’s generally less precise and less efficient. You can also purchase thumb guards to help you play more comfortably while avoiding pain.
Now that you know how to play a single note, the next step is to practise playing different notes alternately with your left and right thumbs, and so on. For example, you can start from the centre of the instrument and have your left thumb play the left tines one by one, then do exactly the same on the right side with your right thumb. If you can remember where the notes are as you go, it will really help when you start playing melodies.
Finally, you can try playing a chord by plucking two tines simultaneously. If they’re adjacent, use the same thumb to make them vibrate at the same time. If the tines are spaced farther apart, press both tines at the same time with both thumbs. Of course, it’s also possible to pluck three tines—or even four—if the layout allows you to strike them using both thumbs.
You now know all the basic techniques to start learning the kalimba. It’s time to practise and master your instrument. You may experience some thumb pain at first, but your fingers will quickly adapt, and you’ll stop noticing it after a few weeks of practice.
How can you improve your kalimba or mbira playing?
It’s natural to want to improve so you can get the most out of your kalimba. Once you’ve mastered the techniques above, the ones below will take your playing further.
How to read sheet music or tablature for mbira?
Knowing how to read sheet music or tablature for the mbira or thumb piano is very important and often essential for any instrumentalist. Who hasn’t wanted to play well-known tunes like the Game of Thrones theme or the Harry Potter theme on their kalimba? With tablature, that’s completely achievable.
The next step in your progress is to learn how to read sheet music. At first glance, this may seem insurmountable, because most people immediately picture traditional sheet music with its parallel black staff lines filled with music notation. Kalimba sheet music and tablature are very different from that.
In fact, everything has been designed to make reading easy and to make these scores accessible to everyone. Never studied music theory and don’t have any special background in music? No problem—you’ll get there, I guarantee it. Just read our article on how to read kalimba sheet music carefully. In just a few minutes, you’ll understand how to play beautiful songs using tablature.
Some sheet music is more difficult than others, so practising with it is an excellent way to improve your kalimba skills.
Mastering advanced techniques on your sanza
To further improve your performance on the sanza, another name for the kalimba, it’s useful to learn how to do glissandos and create sound effects with the thumb piano.
1 – The glissando
The glissando is an Italian term that refers to a technique for playing several notes quickly by sliding your thumb across multiple tines. To do this, place your thumb on a tine, press down, then move to an adjacent tine while keeping the pressure. By doing this quickly, you can play several notes with a very pleasant sound. Here is a video demonstration:
2 – Sound effects
Earlier in this article, I mentioned the holes on the front and back of the kalimba. It turns out these holes can be used to create sound effects. For example, after playing one or more notes, if you move your thumb back and forth in front of the central hole on the front, you’ll create what’s known as a wah-wah effect. Watch this example:
You can also create another effect in a similar way, but using the two holes on the back of the thumb piano. This time, you’ll use your ring fingers to produce a vibrato effect. Watch a demonstration video:
Please note that these holes are only found on kalimbas with a sound box, which are often made of wood, and sometimes the two back holes are omitted. If you have a kalimba without a sound box, you simply can’t perform these effects. These two techniques aren’t essential, but they add a welcome layer of variety when you play melodies.
How long does it take to become good at playing the kalimba?
It all depends on how regularly you practise and how much time you invest in this instrument. Most players reach a satisfactory level in a few weeks, or in a few months.
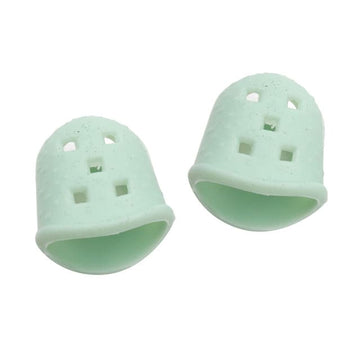
Perfect your playing with finger protectors
Learning to play the kalimba isn’t very complicated. It just requires mastering a few basic techniques and some others that are slightly more difficult—but far from impossible. You now have everything you need to develop your thumb piano playing and unlock the full potential of your instrument.
However, the most common challenge when improving on the kalimba is not having long fingernails. Many musicians can’t—or don’t want to—grow their nails just to play the thumb piano. To address this issue, the Instruments du Monde store offers protective covers specifically designed for thumbs to help you develop your playing.
Get these thumb protectors by clicking on the image below:
Now you know the basics of how to play the kalimba effectively, but did you know that depending on the number of keys on the instrument, it won’t be suited to the same players? Learn what the perfect number of tines is for your kalimba so you don’t make a mistake when choosing your next thumb piano. Supplement this reading with our guide to everything you need to know about the kalimba.


