


Written by Ambre Montespan - Updated on Jun 11, 2026
Table of contents:
Want to design your own personalized thumb piano using recycled materials? Looking for a fun craft project—alone or with children—that results in a beautiful African musical instrument you can actually play? What tools and materials do you need to make a mbira?
I’ve already successfully made more than 10 kalimbas, also known as mbiras or sanzas, using whatever materials I had on hand, so I can easily help you and walk you through the process step by step.
To make a kalimba, you’ll need materials for a base, a set of tines, a structure to hold the tines on the base, and the right tools to assemble everything.
By reading this entire article, you will learn:
- What steps to take before making a kalimba
- How to design your African musical instrument step by step
- What you must not forget after making a thumb piano
As a result, you’ll be able to craft a personalized kalimba with ease and perhaps later offer this rewarding activity to friends or children, who will love making their own musical instrument.
Learn the best way to make your own sanza with DIY (do it yourself)!
How to Prepare Before Making Your Kalimba
The biggest mistake you could make when making a kalimba is jumping in without preparing first. For this project to be a success, you need to understand how the instrument works, as well as which materials and tools are essential to build it properly.

What are the different parts of the instrument you need to get started?
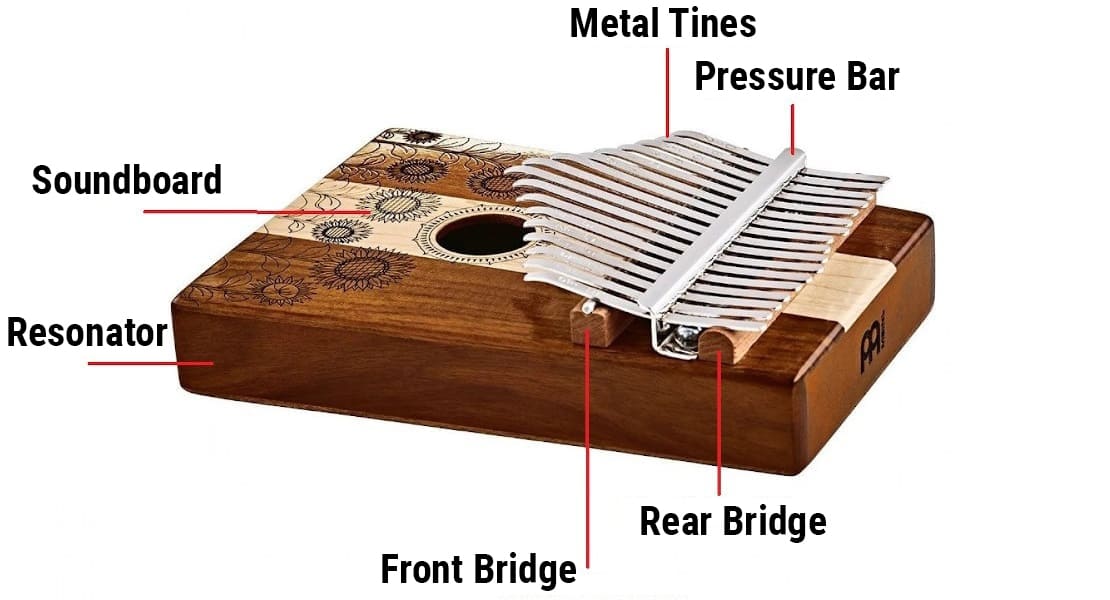
It’s helpful to briefly review how a kalimba works so you can understand the purpose of each part. The kalimba is a percussion instrument where the musician presses down on one end of the metal tines and then releases them. When the tines are released, they vibrate because their other end is held in place by a structure consisting of a front bridge, a rear bridge, and a pressure bar.
The vibrations then spread to a base called the soundboard. This soundboard can be a simple block of wood, or it can be hollowed out to form a resonating chamber. A circular hole is drilled into the soundboard, and the frame around it is called the resonator.
Below is a diagram summarizing all the parts of a classic kalimba:
What materials do you need to make your own thumb piano?
To make your own thumb piano, you will need:
- A wooden base and wood stain
- A pressure bar
- Two bridges
- A set of metal tines
- Neoprene glue and solvent
Taking a closer look at each item helps you choose the options that best fit your project.
1 – The wooden support and stain
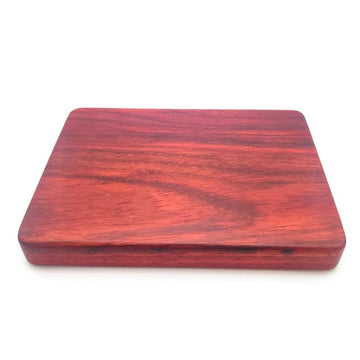
This support can be a simple wooden board or a box-shaped structure. It can be built using several other boards or made directly from an object that already has this shape, such as an old cigar box or an emptied calabash. You can also use a sardine tin (or any tin can of similar shape) as a resonator: simply remove the lid and cover the opening with a board that is exactly the same size as the lid, as shown in the photograph below.

If you’re unsure whether to choose a kalimba with a sound box or one made from a simple wooden board, keep in mind that it depends on what you want from the instrument—its tone and acoustics will change. See our comparison between kalimbas with and without holes. This guide will answer all your questions about these two types of thumb pianos.
For a simple wooden block without a sound box, we recommend a board measuring about 8 × 6 × 0.8 in (20 × 15 × 2 cm) for a 17-tine instrument. If you opt for a model with a sound box, for the same number of tines, use the same length and width, and make sure the wall thickness is at least 0.2 in (5 mm), which should give you a total thickness of about 1.6 in (4 cm). However, the length and width can be adjusted if you want a kalimba with more or fewer than 17 tines.
You can also purchase a block of wood specially selected for kalimbas directly from Instruments du Monde. This will give you the best in terms of both vibration transmission and the beauty of the wood grain.
Finally, always choose solid wood that has not been made from reconstituted wood chips. This improves both vibration transfer and durability. You’ll end up with a more melodic instrument with clear, satisfying tone. If you’re wondering which wood to choose, take a look at our article detailing all the differences between the types of wood used for kalimbas. After reading it, you’ll have a few instrument-making basics and you’ll know whether it’s better to choose mahogany, pine, spruce, rosewood, or padauk, depending on what you expect from your African instrument.
You can watch this video, which shows a simple way to build a wooden box using a few nails and boards. Then just adjust the dimensions to suit your needs.
Finally, an optional wood stain helps protect the wood from everyday wear while keeping the grain visible, unlike regular paint.
2 – A pressure bar
The pressure bar is an essential component that presses down on the metal tines so they’re held firmly against the two bridges and produce a clear, balanced tone. For our homemade kalimba, you’ll need a metal tube about 0.4 in (1 cm) in diameter and equal in length to the width of your future thumb piano. You’ll also need two screws to secure this pressure bar.

3 – Two bridges
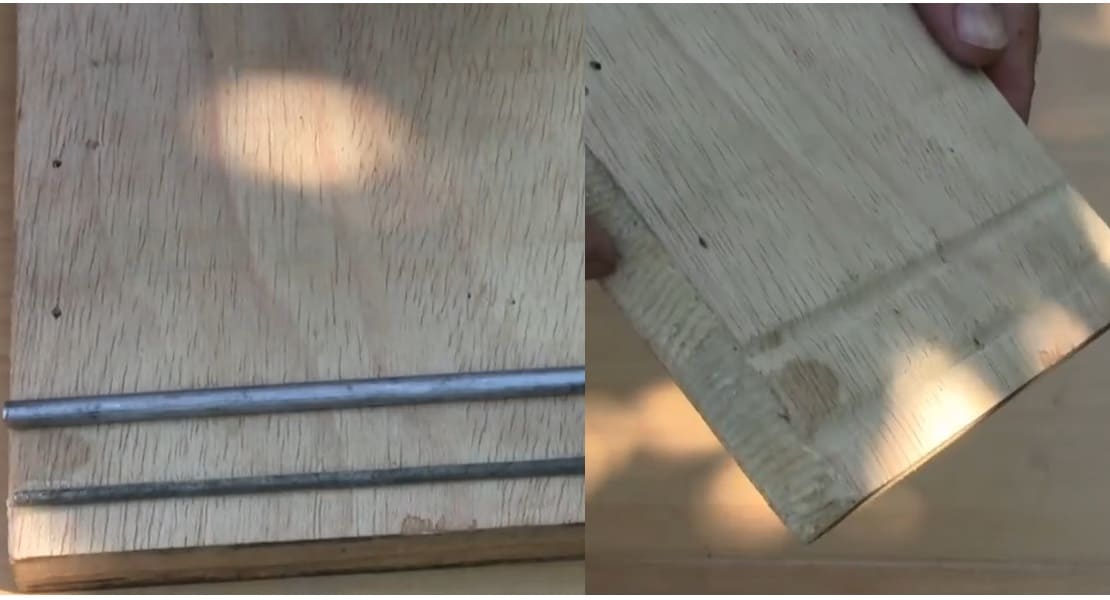
The two bridges lift the tines off the soundboard. You can use long carpenter’s nails, cutting off the ends to obtain metal rods that are the same length as the width of the future instrument. In practice, any metal rod of the right length and a reasonable diameter will work. You can also use wooden sticks or rods, or even bamboo, as was done on traditional West African instruments.
However, you must follow these rules:
-
The front bridge must be higher than the rear bridge. For a standard model, plan for about 0.4 in (10 mm) in height for the front bridge and about 0.3 in (7 mm) for the rear bridge.
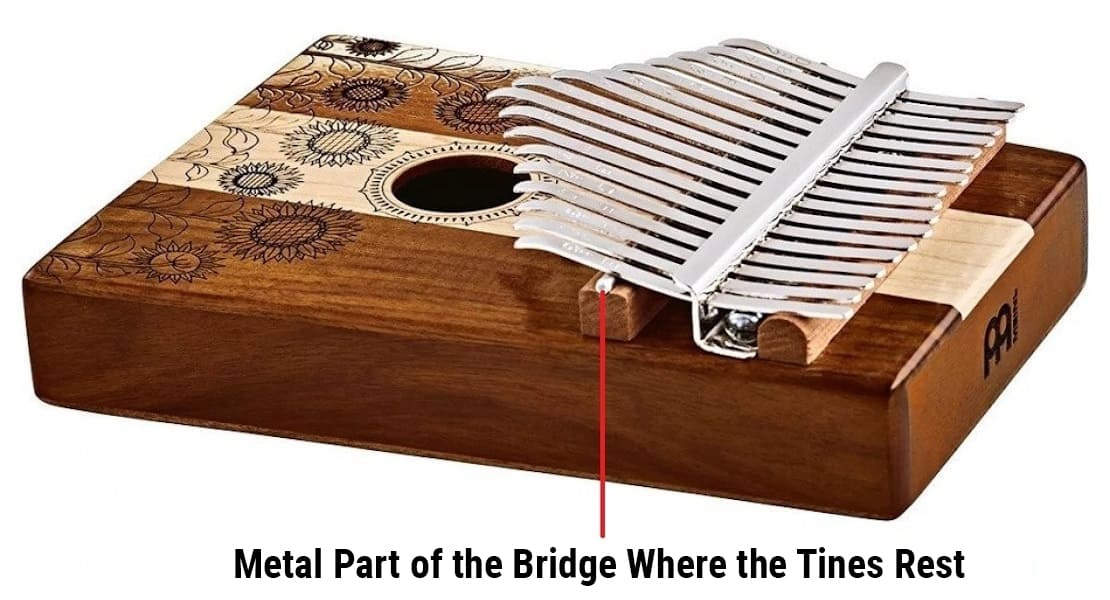
-
The part of the tines that rests on the front bridge must sit on a metal piece. So you can choose a front bridge that’s entirely metal, or one that combines metal and wood, like in the photograph below:
4 – A set of several metal blades
Next, you’ll need a full set of tines, with each tine corresponding to a single musical note. To make them, you can use the tines of an old leaf rake or the spokes of a bicycle wheel, which you’ll need to flatten with a hammer. The goal is to get pieces that are as uniform as possible in thickness and width because that’s key to good sound. As for length, tines around 2.75–4 in (7–10 cm) work very well for a useful note range. Short tines produce higher pitches, while longer tines produce lower ones. If they’re too short or too long, they simply won’t vibrate properly and may stay silent.
5 – Neoprene glue and nail polish remover
You’ll need glue to attach the different elements. Neoprene glue bonds metal to wood effectively, and a solvent (such as acetone) helps you remove any smudges or glue residue that may appear once your mbira is complete.
6 – The alternative method
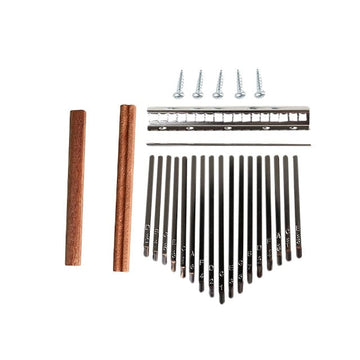
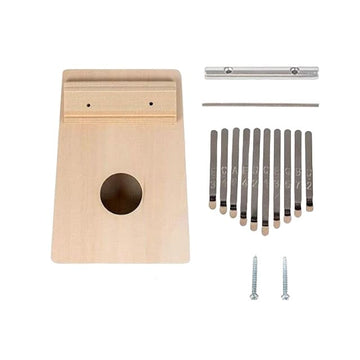
If sourcing tines, two bridges, and a pressure bar from recycled materials feels too complicated, Instruments du Monde offers a complete kit that replaces all these elements. This convenient option also means you won’t risk injury while making the parts for your kalimba.
Discover this DIY kalimba kit by clicking on the image below:
What tools are essential for making a kalimba?
You will need the following tools to make your kalimba. Depending on the materials you use, some of these may be optional.
- A screwdriver
- A hammer
- A drill with a set of drill bits and a 1.2 in (3 cm) diameter hole saw
- A sander and/or sandpaper
- A rotary electric multi-purpose tool such as a Dremel
How long does it take to make a mbira?
Again, it depends on the materials you use. If you have the DIY kalimba kit mentioned above, you can expect to assemble it in about an hour; otherwise, you may need to double or triple that time depending on your equipment.
How do you make a kalimba step by step?
Now that you have all the materials and tools you need to make your sanza, it’s time to start assembling it.
Making the support or soundboard for the kalimba
At this stage, you should have one or more boards for making the support for your kalimba. Cut them to the size of the instrument you want to make or according to the recommendations we have given below.

Next, use a sander or sandpaper to make the boards as smooth as possible to the touch. Each type of sandpaper has a number that corresponds to a grain size. The higher the number, the smoother the result. On the other hand, the work will take much longer. Therefore, it is best to start with a low-grit sandpaper and gradually increase the grit size until you achieve the desired result.
Once the board(s) has/have been sanded and cut, protect them by applying one or two coats of wood stain. Leave to dry. If you want to make a kalimba with a sound box, use a drill and hole saw to make a hole about 1.2 in (3 cm) in diameter in the board that will become the soundboard.
How do you build the structure that holds the sanza blades?
Using neoprene glue, position the two bridges on the soundboard. Leave a space of about 0.4 in (1 cm) between the top edge of the soundboard and the rear bridge, and a gap of about 1.2 in (3 cm) between the two bridges. Be careful not to confuse the front and rear bridges. If you chose metal bridge rods, set them in place first, then gently tap them with a hammer to create a shallow groove in the wood; this improves the fit and makes the neoprene glue even more effective.
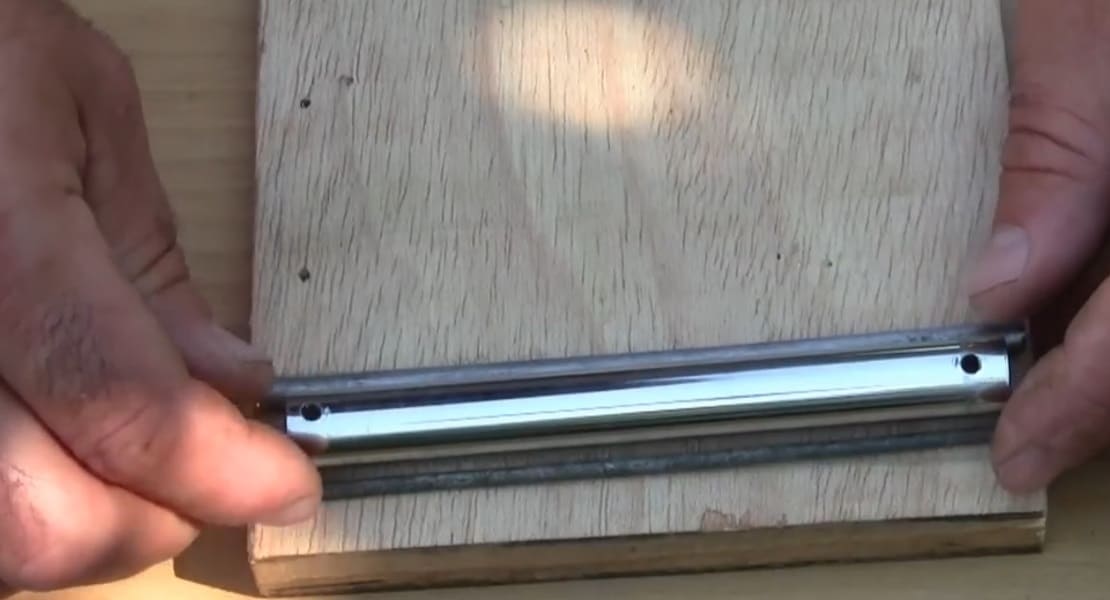
Use the solvent to remove any glue residue. Once the bridges are in place, install the pressure bar. It goes in the space between the two bridges. If you have the one from the kit, just position it correctly and screw it in. If you have opted for the metal tube, drill two holes through it. The first hole should be near one end of the tube and the second hole should be near the other end. The diameter must be large enough to allow the tips of the screws you are going to use to pass through. This is what the tube should look like after drilling.
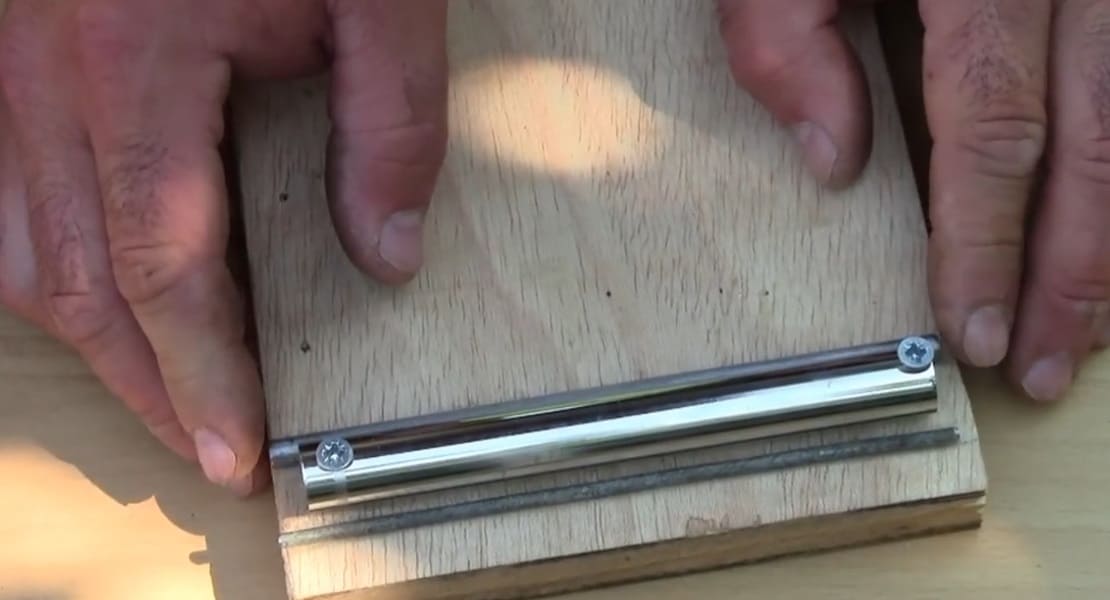
Next, insert a screw into each hole, position the pressure bar between the two bridges, and screw it directly onto the soundboard, leaving enough space to insert the tines later. The result should look like the image below.
How to place the blades on your musical instrument?
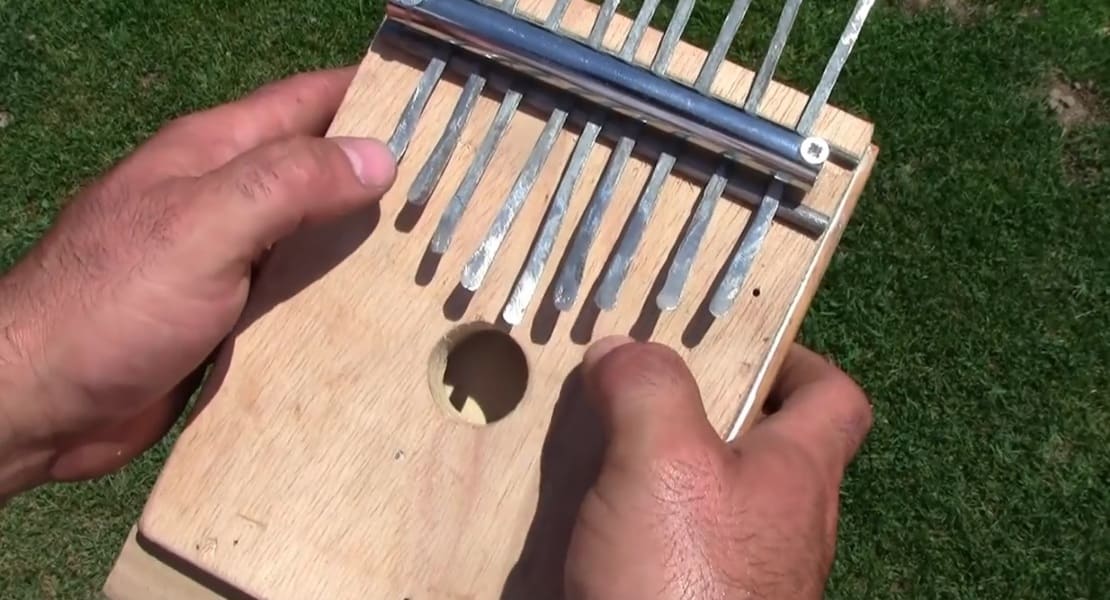
Now simply place your metal blades to produce sound. If you chose the DIY kit for kalimba, insert the tines with firm pressure. They should sit above the two bridges and slide into the square-shaped hole in the pressure bar. If you’re using a tube as your pressure bar, simply place the tines above the bridges and below the tube, then tighten the tube screws evenly to apply pressure. The tines will be sandwiched between the bridges and the tube, ensuring clear, resonant vibration. Finally, if you’ve crafted your own tines, use a Dremel-type tool to smooth the metal and help prevent future finger injuries.
Once all your blades are in place and securely fastened, you can finally design the box around the soundboard if you have opted for a soundbox model. You should get a result similar to this.
Don’t Forget This After Making Your Own Mbira
And there you have it—your sanza is now complete. Test the tines and you’ll hear a clear tone every time you play them. To fully finish your instrument, be sure to clean it, maintain it, add stickers, and tune it.
Cleaning and maintaining your musical instrument
After crafting your own musical instrument, it’s not uncommon for various residues to accumulate on it. Gently wipe it down with a soft cloth to remove any dirt that might get between the tines, bridges, or pressure bar and compromise the acoustic qualities.
Because your mbira is crafted from wood and metal, we recommend conditioning it with a suitable oil to help protect against wood deterioration and metal corrosion.
Applying Stickers
Kalimba stickers are small decals that attach to the metal tines of your instrument, helping you locate the right tine for each note. Take a look at this comprehensive guide to learn how to apply kalimba stickers. You’ll quickly see why these stickers are one of the best ways to make faster progress on the thumb piano.

Tuning the kalimba
When you buy a kalimba, it is normally already tuned, but that won’t be the case with the one you’ve just made. It is essential to tune your kalimba using an electronic tuner if you intend to play a few melodies on it. But don’t worry—everything you need to know about tuning kalimbas is included in this tutorial. You’ll find it easy to do, and your sanza will have nothing to envy from models built by professional musicians and instrument makers.
Design your African musical instrument much more easily!
Anyone can craft a handmade kalimba from recycled materials. All you need is a few tools and a little time to achieve a satisfying result. Now that you know all the materials and tools you need to make this African musical instrument, you can easily build your own collection of homemade thumb pianos to play lively rhythms.
However, we know that some people aren’t into DIY, don’t necessarily have the recycled materials needed to make a mbira, or want to introduce this musical activity to children or teenagers who could injure themselves with tools. With all these people in mind, Instruments du Monde offers a complete kalimba kit to build. Once assembled, you can paint the instrument in bright colors to make it uniquely yours. This fun, hands-on activity delights players of all ages while offering an unusual way to explore music.
Treat yourself to this kalimba kit now by clicking on the image below.
Pick a fun hands-on activity with this build-your-own kalimba kit
If your finished kalimba doesn’t meet your expectations, don’t worry—it’s challenging to match the precision of professional builders. The best solution is to buy a thumb piano. But where can you buy a high-quality kalimba? We answer this question by giving you advice and recommendations to help you make a successful purchase. Speaking of advice, you can find it all in this guide to thumb pianos.


